Adding Ratios
You can add custom ratios to any of the six categories of ratios on the Ratios setup page.
Only one user at a time is allowed to
work with ratios. Any subsequent users accessing this setup page are placed in view-only
mode.
- Select Setup > Ratios from the menu.
-
Select
 Add.
Add.
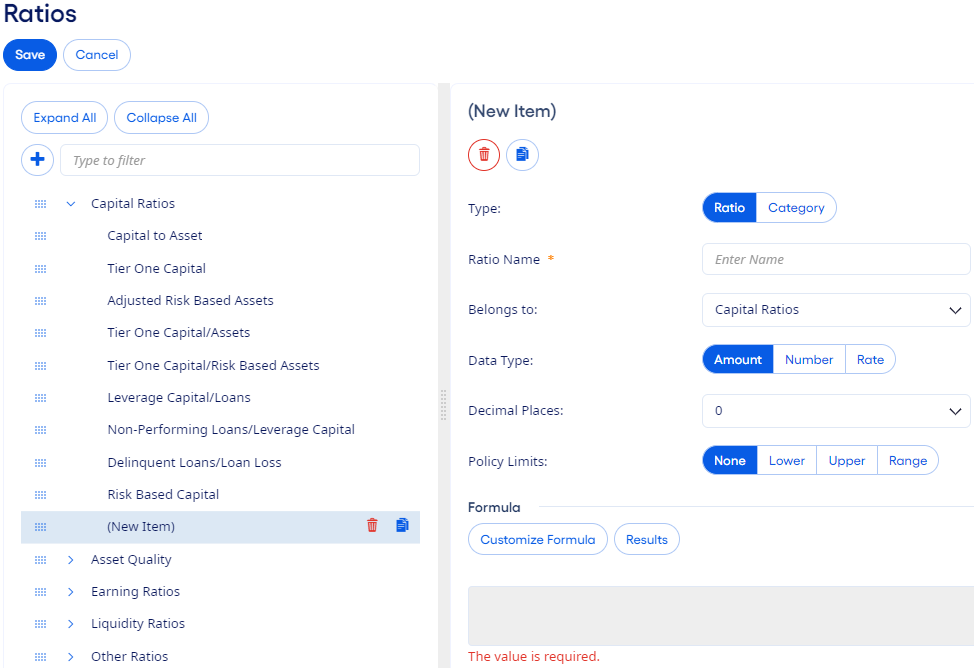
- Select Ratio or a user-defined ratio Category for Type.
-
Enter a unique Ratio Name or Category
Name depending on the selection in the previous step.
A recommended best practice for selecting a Ratio Name is to choose a name that is easily differentiated from the predefined ratios.
- Choose the category for this ratio in the Belongs To drop-down list.
-
Select one of the following for Data Type:
- Amount
- Number
- Rate
This setting controls how the calculated results appear in various screens and in reports. After a ratio is saved, this setting cannot be changed. -
Use Decimal Places to indicate the decimal precision to apply to
this ratio.
The effect of this setting can be seen on the Forecasting Ratios page and in reports that include ratios.
-
Select one of the following for Policy Limits:
- Lower - Select Lower to set a minimum value for the ratio.
- Upper - Select Upper to observe the maximum value of the ratio (for example, loans to deposits).
- Range - Select Range when it is strategic to watch both the high and the low values.
Limits are based on your institution's policy guidelines. Your selection depends on the characteristics of the current ratio. -
Select Customize Formula to define a formula for the ratio on
the Customize Formula page.
- Select Data or Functions for the Type.
-
Enter the Formula.
Use the Category or Function drop-down list to show more formula options.
- Select Results to review the formula results.
- Select Apply.
- Select Save.
Parent topic: Ratios
Related concepts