Setting Up an Advanced Decay Category
Use this information to create categories with multi-year or multi-month capabilities.
-
Select
 Add.
Add.
-
Select Add to add a rate shock scenario.
If your decay studies indicate that 90 percent of your current demand deposit accounts (DDAs) will leave the institution within 15 years, then use 14.2 as the Flat Rate in the decay table.
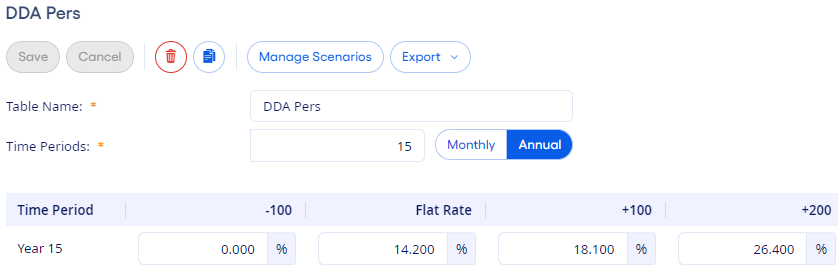
If you expect 95 percent of the accounts to decay in the same amount of time if rates go up 100 bp, then enter 18.1 in the +100 field.
Figure 1. Sample Annual Decay Rates
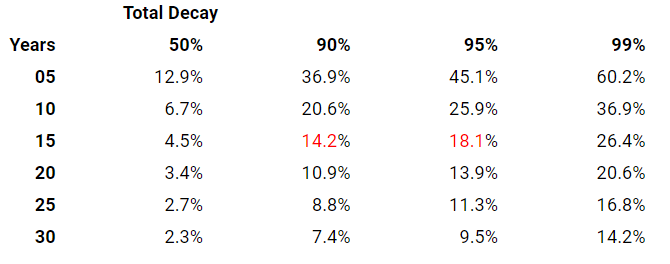
Figure 2. The Year 15 Row in an Advanced Decay Table
The formula for determining the total decay rate is:

Where:
- n = number of years
- y = fraction remaining after n years
After an advanced category is set up,
you can assign it individually to specific accounts on the panel.