Creating a Budget What If Model
You can create a dedicated what-if model for distributed forecasting purposes for your budget forecast and assign user access privileges on the What If Models setup page.
- Select Setup > What If Models from the menu.
-
Select
 Add to begin the process of creating a model.
-
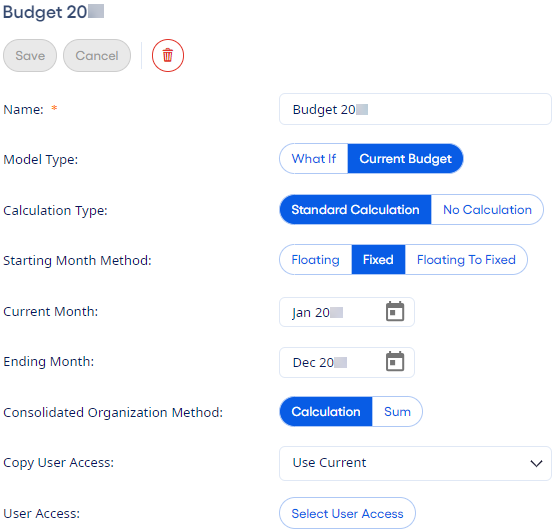
Complete the following fields:
- Enter a Name to appear throughout the application.
- Select What If as your Model Type.
- Select Standard Calc as your Calculation Type.
-
Select Floating, Fixed, or
Floating to Fixed for the Starting Month
Method.
- Starting Month Method
-
This field controls the months that appear in the model. You can change this method after a model is created. You have the following options:
-
Floating - For this method, the model's starting month is always the application's Current Month (last processed month). You can select any future month as the Ending Month.
Use this option if you want the model to show some months, which move forward relative to the Current Month.
-
Fixed - This method lets you define a static range of months that stays the same even after the monthly update runs. Select any historical time frame as the Current Month. Choose any later month for the Ending Month.
This model provides a snapshot of your data where all cash flows are calculated from the Current Month that you choose. The rest of the months are forecasted months that subsequent monthly updates do not affect.
-
Floating to Fixed - For this method, the starting month is always the application's Current Month. When the model reaches the designated Fixed Month, the months remain constant from the Fixed Month to the Ending Month.
Use this method to work on a budget up to a certain point after which you do not want it to change. For example, if the Current Month is September, then you can set the historical data to update (or float) until December (the Fixed Month). Then, have the months until the following December (the Ending Month) remain fixed and unchanged for your forecasting.
-
-
Complete the following fields:
- Consolidated Organization Method
-
This field controls how accounts at your consolidated organization levels behave in the Forecasting Detail and Forecasting Supplemental Data pages. You have the following options:
- Calculation - Keep this default option if you want to edit and forecast accounts for consolidated organizations.
- Sum-Minimal Calculation - Select this option if you want consolidated organizations treated as simple summations of their lower organizations. As a result, a consolidated organization's accounts, except for balancing accounts, are read-only on the Forecasting Detail page. On the Forecasting Supplemental Data page, all organizational accounts are read-only except for accounts with the Ratio Code set to either Federal Tax Rate or State Tax Rate.
- Sum-No Calculation - Select this option if you want consolidated organizations treated only as subtotals of their lower organizations. No calculations occur after the data is summed via a consolidation. No consolidated organization is editable. This option is typically used for holding companies.
Note This field does not appear for single-organization institutions or when a model's Calculation Type is set to No Calculation. - Copy Setup From
- This field allows you to select an existing model to use as the source for the new what-if model's accounts.
- Copy Data
- This field is selected automatically when the Calculation Type for a new model is set to Standard Calculation. If you choose the No Calculation option, then you can specify whether to copy data from the source model.
- Copy Comments
- This field allows you to copy comments from the source model to the new what-if model.
- Notes
- This field is a text box where you can enter explanatory information.
- Copy User Access
- This field allows you to select the appropriate what-if model from the drop-down list if you have existing what-if models that you want to copy predefined user access from. The field defaults to Use Current, allowing you to define access rights for your users manually.
- User Access
-
This field allows you to specify the users who are allowed to use the new model. Select Edit, View, or None next to a user role or individual users whose access you want to modify.
The new model is hidden from users who you do not select. If you save a model without choosing users, then User Access sets to All. Set this field to All if you want users who are added to the application later to have automatic access to this model.
Tip Keep User Access set to None for non-administrator users when initially creating the what-if model. When you are ready to open the forecast for end users, modify the User Access setting to Edit. - Review Structure
-
This field allows you to turn on a review structure for users to submit their budgets for approval to another person.
If you select this option, then an Included Organizations field appears where you can select the organizations that you want to include in the Review Structure.
- Allows Subledgers
-
This field allows your users to add subledger accounts. These accounts make it possible to forecast using greater detail than what appears in the forecasting grids. Examples are items like employee salaries, fixed asset purchases, and specific travel expenses.
If you select the Allow Subledgers, then the Copy Subledgers field appears. If you select this option, then the application allows you to copy subledgers.
- Select Save to complete the process.