Completing the Monthly Update Process
You can complete the monthly update process on the Monthly Update Process page to process the core system and third-party records that were uploaded to the cloud-based file server.
-
Select from the menu.

-
Select one of the following situations and follow the steps to select the extract file
set to process.
Situation Steps Adding/Replacing a File Set Use this option to add all files manually, upload missing files, or replace incorrect files in the extract set.
- Select Add/Replace.
- Select Select.
- Browse and select a file to upload.
All uploaded files must be either .csv files or .txt files. New files must have a unique name. If you are replacing a file, then the name of the selected file must be the same as the name of the file you are replacing.
- Select Upload.
- Repeat this process to add or replace multiple files.
Tip Files that are not associated with a file type or a layout show as Unmatched in the list of extract files to process.Assigning Files for a File Set Use this option if files are already uploaded.
- Select Assign Files.
- Select an Upload Date from the drop-down
list.
If you must rerun a previously processed set of files, then you can select older sets from this list. When a set is selected, you can review the file names before assigning the files.
- Select an Assigned Month.
- Select Assign.
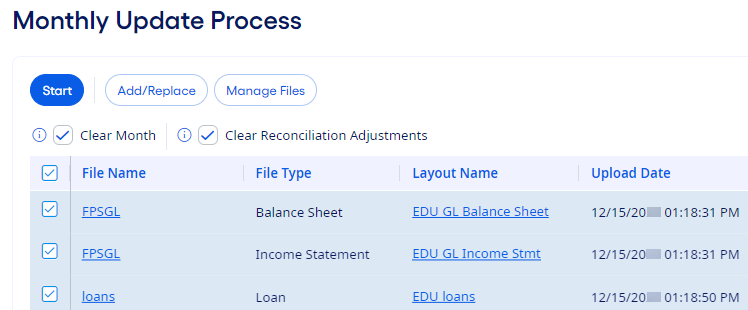
After the files are added and/or assigned, the file set appears in a grid.
-
Verify that the appropriate data files are selected, and modify the selected files as
needed.
If a previous month is uploaded, then use the Clear Month check box to clear data from that month. You can also select the Clear Reconciliation Adjustments check box to clear manual edits from that month. This option only affects edits made on the Balance Sheet and Income Statement page. Select the Reset CECL Status check box to force a reset of the CECL status if needed.
You can select the File Name for a file to download it. You can also select the Layout Name to open the File Layout Setup page to modify the file layout and data mappings.
Use the
 Delete option to remove files as needed. You can delete unmatched
files or ignore them. The monthly update process ignores unmatched files.
Delete option to remove files as needed. You can delete unmatched
files or ignore them. The monthly update process ignores unmatched files. -
Select Start to run the monthly update process.
If you are running the monthly update process for the first month of your institution's new fiscal year, then a warning message appears. The message indicates that data may be lost if you have not appropriately set up or created a new what-if model that contains your budget data.
If you have products and/or accounts that are not assigned an FTP method, a warning message appears. The message indicates that the products and/or accounts use the default FTP rate if you resume the update.
A progress bar appears to show the current stage of the monthly update. During the first In Progress stage, the application begins interpreting the information in the data files and validating that the information can be processed.
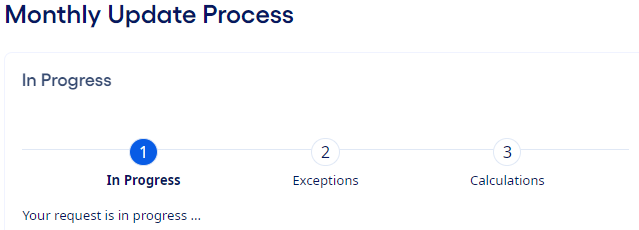
Progress messages appear as the process moves through the update and post-update stages and steps. If a problem is encountered, then a troubleshooting best practice is to note the current stage and step of the process. For example, the update is in the In Progress stage and the Consuming File Data step is running.
If any instruments use the defined Default FTP Rate, then a report listing those instruments is generated automatically at the end of the monthly update process.
The Monthly Update Process page shows the month completed as the Last Successful Run, and the Update Month advances to the next month.
If no problems are detected, then the process runs until it completes, and you are notified that it was successful.