Adding Relationships from Manage Relationships
You can add relationships on the Manage Relationships page.
-
Select
 Add for the Relationship
list.
A new row appears at the top of the Relationship list.
Add for the Relationship
list.
A new row appears at the top of the Relationship list.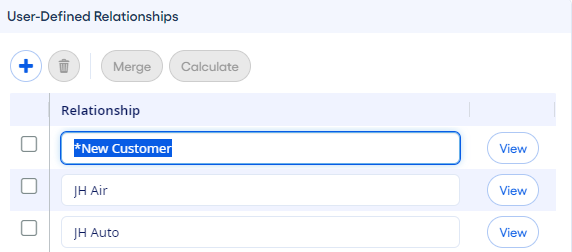
After you save the relationship, you can edit the relationship name by selecting the name in the Relationship list. All relationship names must be unique. If any customers/members are assigned to the relationship before it is renamed, then they remain associated with the relationship after it is renamed.
You can also delete a relationship from the list after it is saved. Select the
 check box next to the relationship name that you want to delete, and then select
 Delete.
After you add new relationships, you can
assign customers/members to them.