You can set up rate sheet tiers when
adding a product to a rate sheet set on the Rate Sheet Set
page.
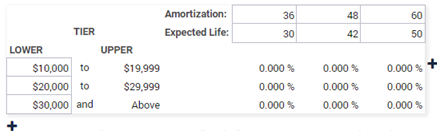
When you add a product to a rate sheet,
an initial set of tiers also appears. Corresponding rates are not calculated until you select
Save.
-
Select from the menu.
-
Open the rate sheet set that you want to work with by selecting its name in the
Rate Sheet Set Name column.
-
Select a rate sheet from the list.
-
Locate the rate sheet product tier that you want to set up.
-
Select
Add to add a row.
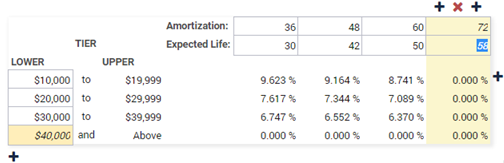
You can add as many rows as needed. Additional columns are also added
depending on the product.
You can select
Delete to remove rows.
-
Update amounts in the Lower Tier column in the tier
table as needed.
You can only edit the lower limit of the tiers to suit the financial
institution's tier sets. The upper limit of each tier determines the lower limit of the
next highest tier.
-
Update the percentages in the Rate Paid column in the
tier table for deposits as needed.
-
Select Manage Columns to update the
Amortization and Expected Life for loans,
if needed.
-
Update the Amortization and Expected
Life for each row.
-
Select
Add to add a row.
You can add as many rows as needed. You can also select
Delete to remove rows as needed.
-
Select Apply to save your changes and return to the
Rate Sheet Set page.
-
Select Save.
The application fills in the rates that are necessary to meet the target return on
equity (ROE).
Tip: Rates are calculated using
the midpoint dollar amount for each tier. For example, if a tier is $20,000 to $29,999,
then the midpoint is $25,000.