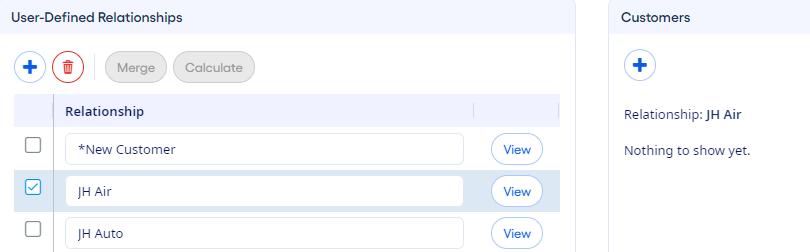
Assigning Customers/Members to Relationships
You can assign customers/members to relationships on the Manage Relationships page.
-
Select the check box that precedes the name of a relationship.
The Customers/Members list appears.
-
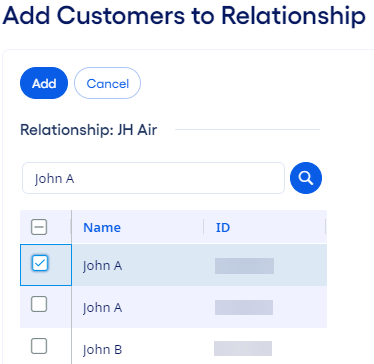
Select
 Add for the Customers/Members list.
The Add Customers/Members to Relationship page opens.
Add for the Customers/Members list.
The Add Customers/Members to Relationship page opens. -
Select the
 Search option.
Matching data appears that is drawn from existing customer/member names that are brought into the application from the monthly update process.
Search option.
Matching data appears that is drawn from existing customer/member names that are brought into the application from the monthly update process. -
Select one or more check boxes from the search results list.
-
Select Add to assign the selected customers/members to the
active relationship.
The customer/member names, IDs, and current relationships appear in the Customers/Members list. An option to recalculate affected calculations also appears.
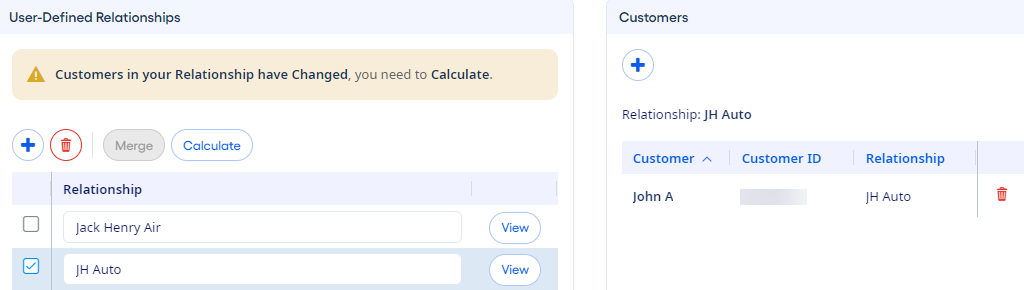
After you assign the customer/member, you can  Delete the assigned customer/member from the user-defined
relationship. You cannot create, edit, or delete customers/members manually on the Manage Relationships page.
Delete the assigned customer/member from the user-defined
relationship. You cannot create, edit, or delete customers/members manually on the Manage Relationships page.
Only one instance of a customer/member can exist in a single relationship, but customers/members can belong to multiple relationships.
Solo-relationship customers/members are handled differently when they are removed from user-defined relationships.